Git Actions for continuous deployments {frontend}
Ever since git actions [https://docs.github.com/en/actions] were introduced, creating workflows, publishing,
Often as a developer, we get limited by the number of resources available on the laptop being used. Whether you are windows, mac, or Linux user, more often than not you either get limited by computational power present in your development environment, main memory, or even internet speed while trying to download relevant dev packages.
I present to you a setup that combines the best of both worlds, the ease of local development, and the speed of a production-based instance.
In a nutshell, it launches an EC2 instance with an installed ace editor. The peculiar thing about this instance is that it gets stopped automatically after 30 minutes in case of no “activity”. This feature of cloud9 greatly reduces the astronomical bills that usually are associated with on-demand EC2 instances.
For example, we choose an m4 series instance for launching a cloud9 instance. Following are the on-demand pricing :
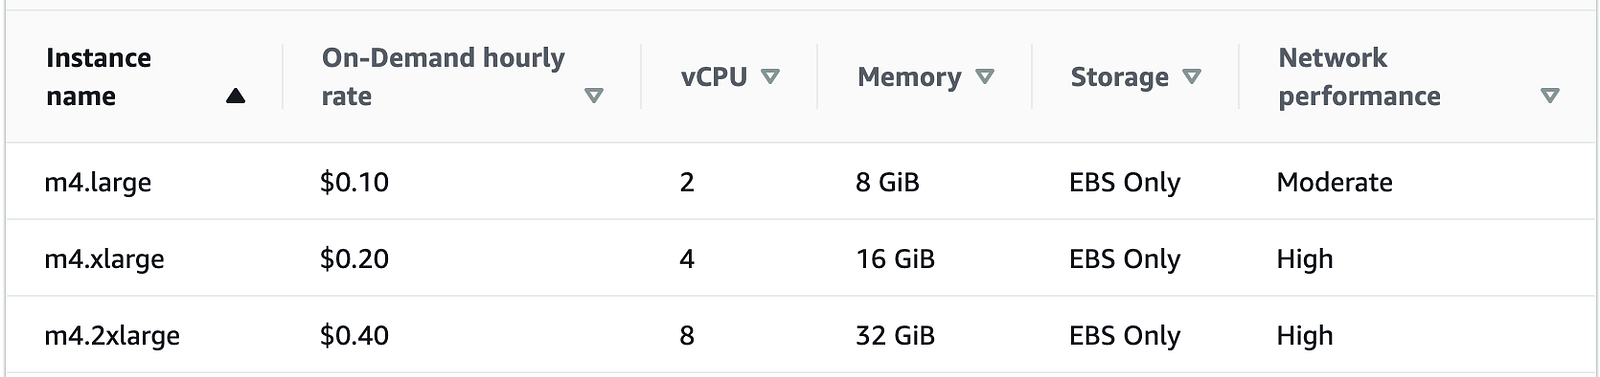
Considering 8 working hours in a month with 22 working days our total cost will look something like :
Now, these are quite affordable monthly tariffs that anyone would be comfortable paying. If you or your employer proceeds to reserve the instances, these prices will drop even more.
One of the most widely used development code editors is visual studio code. The next step is to install the “remote-ssh” extension for visual code.

Creating a config file in your local will easily help you in connecting to the remote cloud9 instance.
cd ~/.sshssh-keygen: to generate the pub/pvt key to directly connect to the newly launched cloud9 instance.config named file under ~/.ssh. [Ignore this step if file is present]Host c9
Hostname 3.7.76.XXX
IdentityFile ~/.ssh/id_rsa
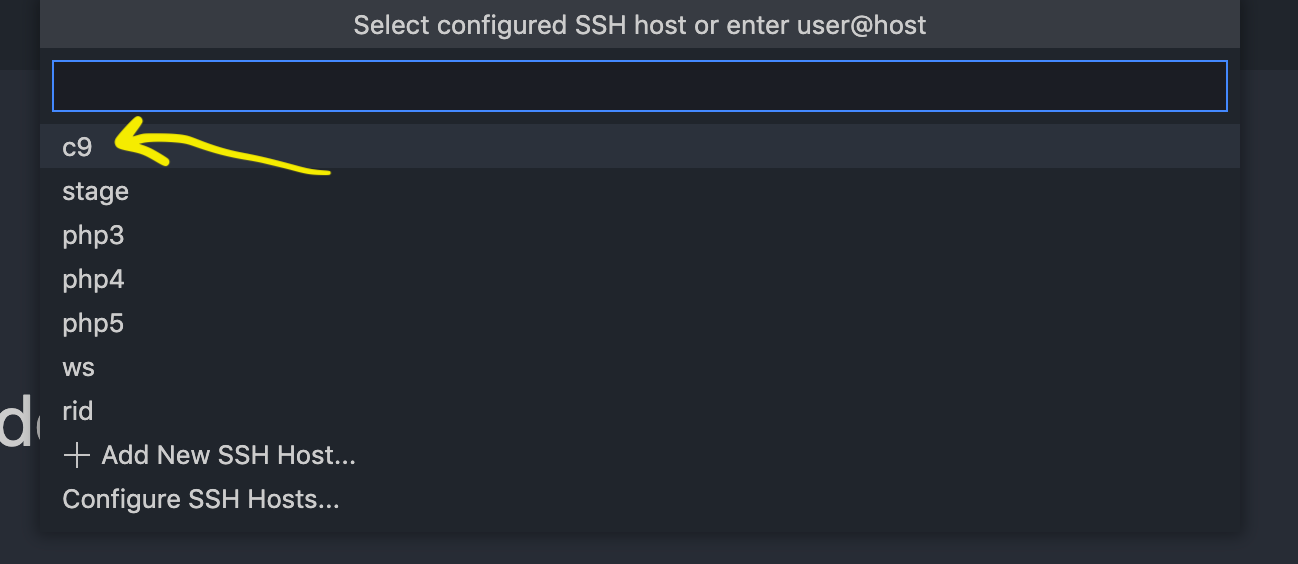
User ubuntu7. Finally connect to your remote instance from visual code.
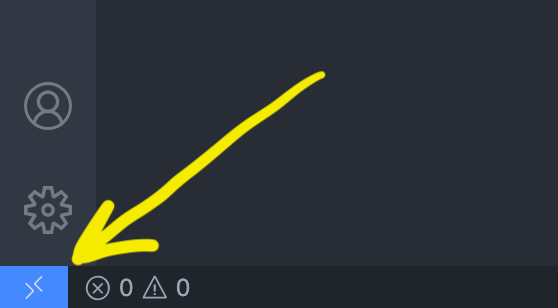
a. Click on the bottom left corner of the code editor.
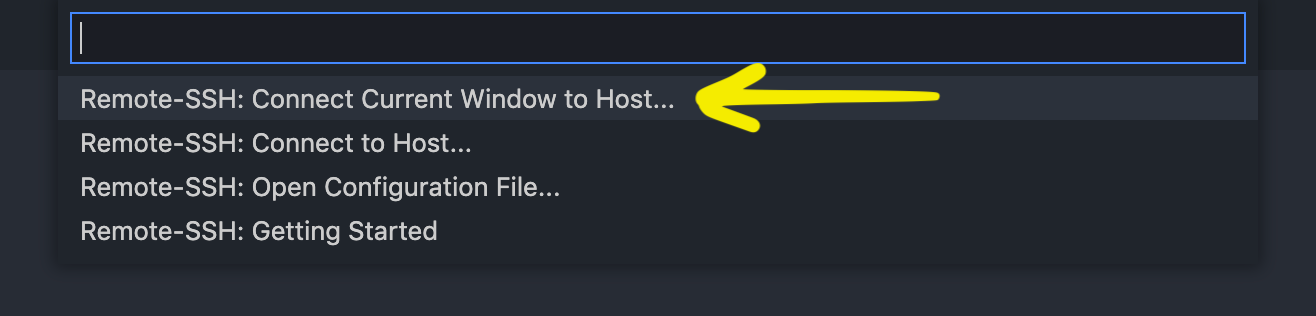
b. Next, choose “connect a current window to remote host”
c. Select the newly created host in the config.
d. After successful connection, left bottom corner of your VS code will display the connected host.
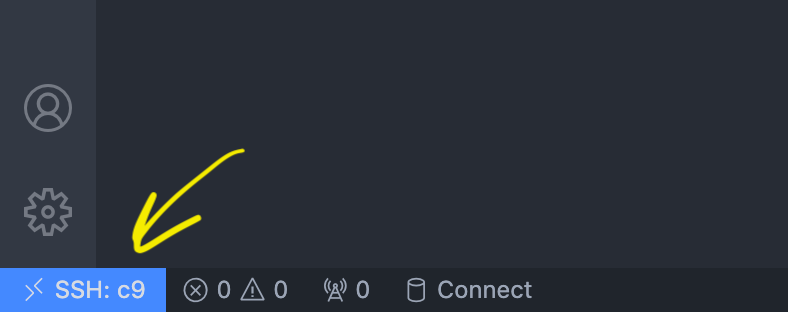
Now you can directly code in the cloud9 instance, install any dependencies with blazing fast internet speeds of an EC2 instance and code away!